
FIELD GUIDE 02 / RIFLE FUNDAMENTALS
36 vs 50 vs 100-yard zero: there is no universal best
Two loads. The same zero. Different paths downrange. The curves show why a familiar distance cannot tell the whole story of your rifle.
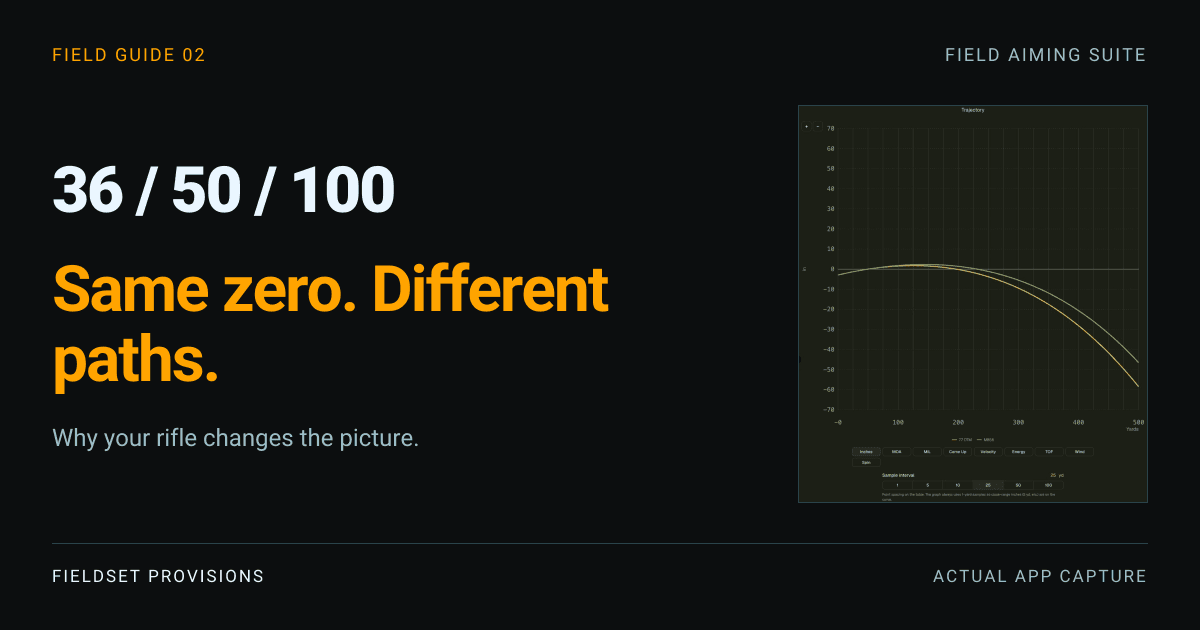
Ask for the best AR-15 zero and the familiar answers are 36, 50 and 100 yards. What those answers leave out is the rifle behind the number.
Two loads can share a zero and still follow different paths. That difference is visible in our calculator: the curves meet at their common reference, then separate farther downrange. A shared zero does not give them a shared trajectory.
Same zero. Different trajectories.
Here, 77 OTM and M855 share the same barrel length, optic height and 50-yard reference zero. Yet the curves pull apart as distance increases.
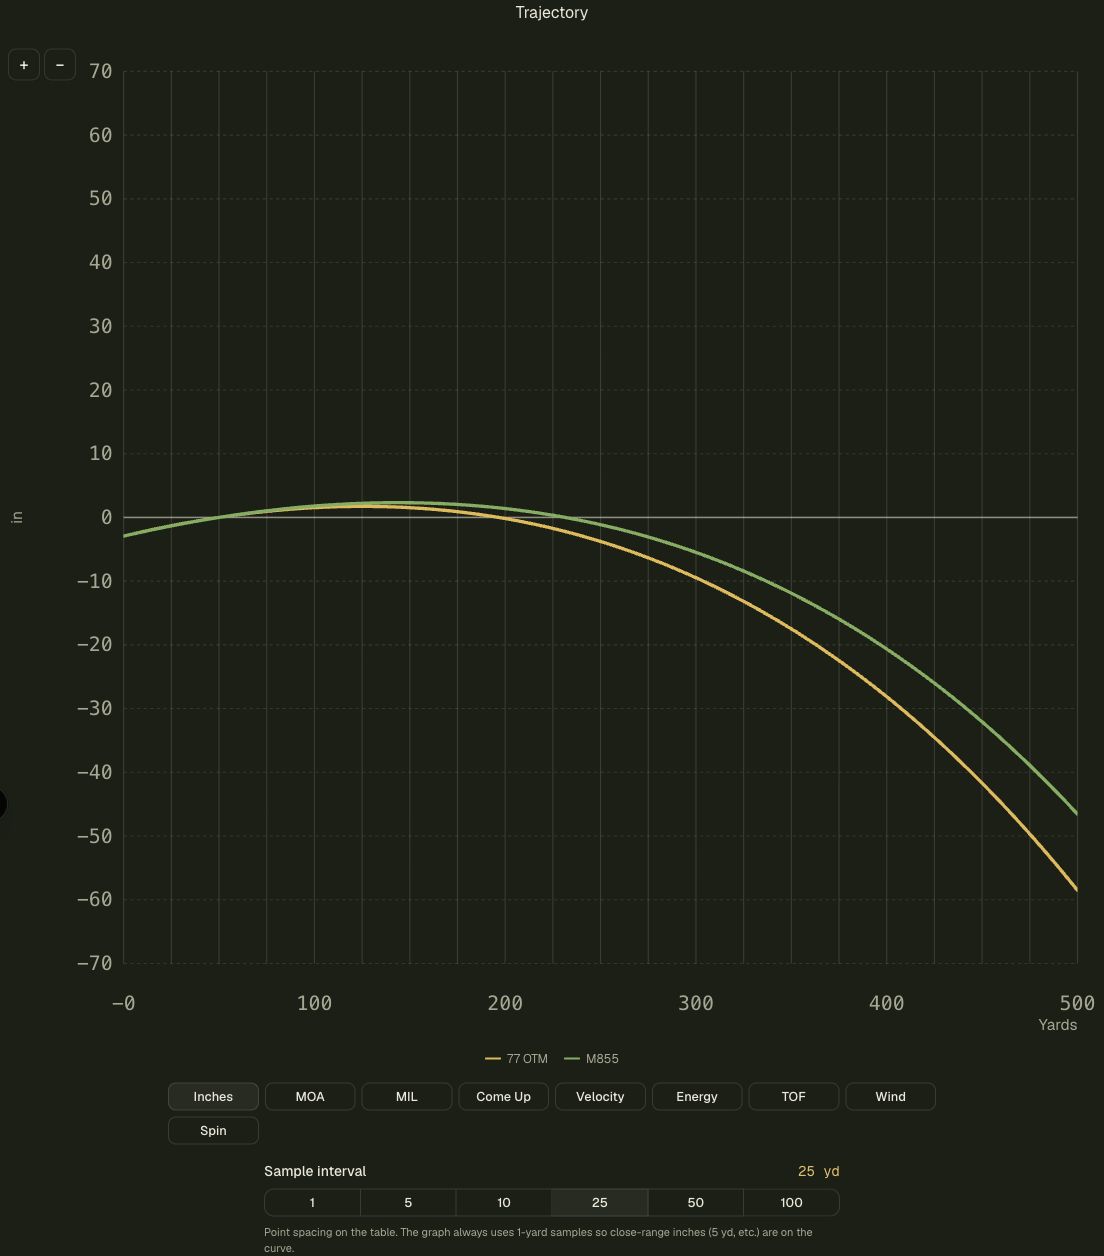
This is the difference that a blanket “use a 50-yard zero” answer cannot describe. The number tells you where the paths meet the sight line. It does not tell you how closely the two loads will track each other elsewhere.
The separation comes from the load models' different velocity and drag characteristics. Air resistance slows a projectile while gravity acts throughout its flight, so the shape of its path depends on more than the distance attached to its zero. [1]
The same zero is compatible with both curves. It does not make the curves interchangeable.
That difference reaches the target
The curves are separated on the graph, and the load markers are separated on the simulated target too. In this view, both loads still share the reference zero. At the illustrated distance, they occupy different positions on the paper.
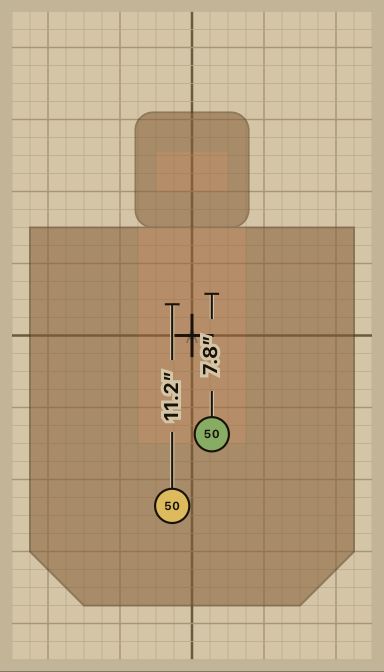
Knowing that both loads are “zeroed at 50” is therefore not enough to describe either load's behavior across distance. The ammunition remains part of the answer.
These are calculated positions and deviation bars, rather than recorded shot groups. A group's size and its location are different measurements. [4]
Barrel length and ammunition change the starting conditions
The comparison above holds the rifle geometry steady and changes the load. A different barrel introduces another reason a familiar chart might not describe your setup.
Muzzle velocity depends on the firearm as well as the ammunition. The velocity on an ammunition box comes from a particular test barrel; an individual barrel and chamber can produce a different result. [2]

Bullet weight does not fill in those missing details. Two loads sharing a grain weight can still differ in projectile design and velocity. Weight is one property of the load. [3]
A chart belongs to the combination it describes. “Same caliber,” “same grain” or “same zero” each gives only part of that combination.
Optic height changes the geometry behind the zero
The optic looks along a line above the bore. Height over bore is the separation between those two centerlines. A taller optic changes that relationship, even when the barrel and ammunition remain the same. [3]
That matters because zero describes where the projectile's path meets the sight line. Change the relationship between the sight and bore, and the old chart no longer describes the same geometry. A familiar zero distance does not make that difference disappear. [1]
Height over bore stays fixed in the pictured load comparison. Its effect is a separate geometry consideration, not the cause of the separation between these two curves.
Why 36, 50 or 100 yards cannot be the whole answer
The graph demonstrates the problem with treating a zero distance as a complete description of a rifle: one reference point can belong to more than one trajectory.
That does not make a common zero wrong. It makes an unconditional recommendation incomplete. A useful comparison needs to say which barrel, load, sight height and conditions it describes, along with what “best” is supposed to mean.
The familiar “50/200” shorthand has the same limitation. The second crossing follows from the trajectory; the first distance alone does not guarantee it. [1]
These images establish that the same zero can accompany different paths. Ranking the available zeros would require a different comparison. The distinction keeps the conclusion tied to the evidence.
Why a personal result can land around 44 yards
ONE PERSONAL SETUP / CALCULATOR ESTIMATE
Around 44 yards.
For Fieldset's owner, the calculator result they preferred for their ammunition, barrel and optic height was around 44 yards.
That was a calculator estimate. It illustrates how a result for a particular setup can fall between the popular presets; the screenshots above show a separate demo profile.
There is no reason a setup-specific calculation must produce a memorable round number. The assumptions behind the result matter more than whether it matches a familiar preset.
Conditions belong with the result
The same principle applies to environmental claims. A chart represents the conditions used to produce it. Atmospheric conditions are part of external ballistics, so a result should carry those assumptions with it. [3]
The Fieldset captures here use standard air. They do not establish performance in different weather or locations. A built-up area or an open range also describes a setting, rather than a complete set of atmospheric measurements.
A zero distance is a reference. The rifle, ammunition, sight geometry and conditions give that reference its context. That is why the number alone cannot stand in for the whole setup.